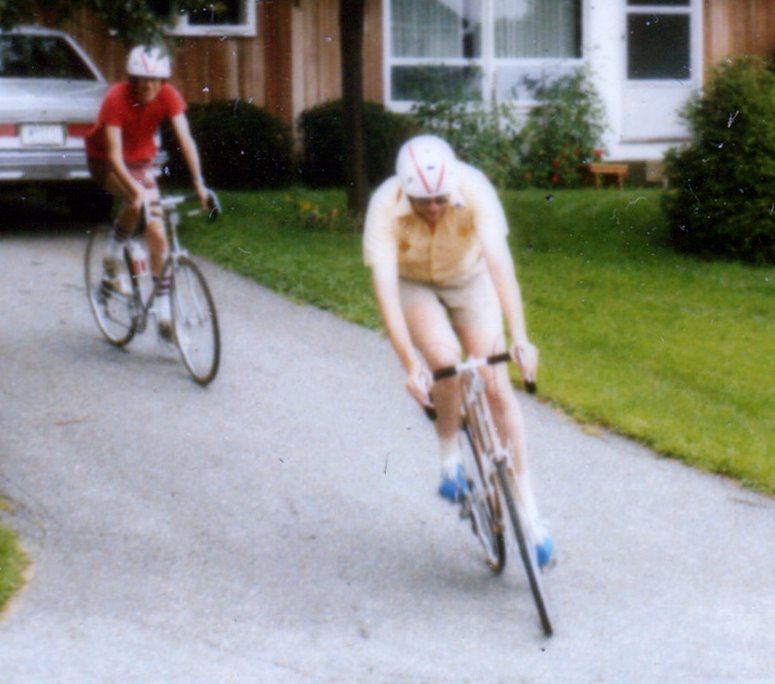
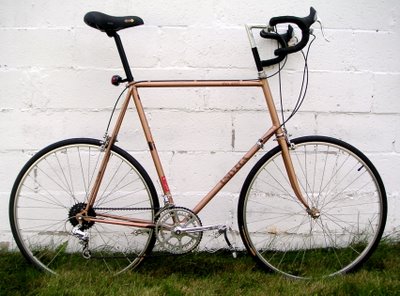
I've been spending a lot of time working on my bike recently. After riding it for a short while with the upright MTB stem and riser bars using SRAM twistgrip shifters, I decided that:
- It didn't handle well. The steering was extremely light and twitchy. I attribute this to the fact that the riding position put most of my weight over the rear wheel.
- It wasn't comfortable. The trouble with the riser bars is that you don't have any choice of hand position, so I was finding that my wrist was getting stiff and sore.
- It wasn't aerodynamic. When riding on the flat or downhill, I could feel the wind pressing against my chest.
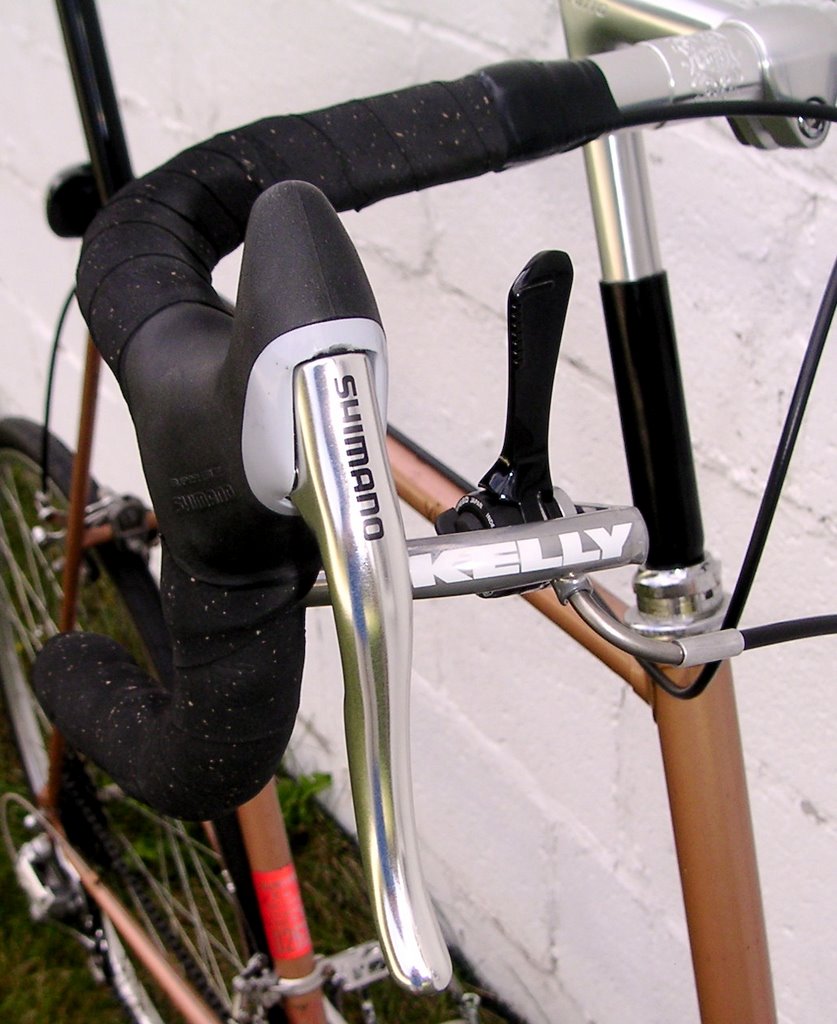
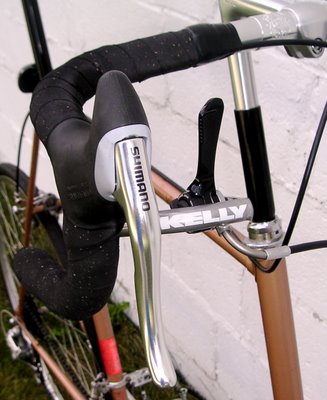
So I decided to re-do the bike using drop bars. The existing drop bars that were on the bike were tiny, and the existing stem was normal size, so the bars were too low. I decided to go with a set of 46cm Nitto noodle bars and a Nitto technomic stem. But even this combination put the bar too low for me. So I got a steel steerer extender which, when used with the Nitto stem, puts the bars about 2 cm below the level of the seat. I also got a set of
Take-Offs from Kelly, which let me mount old-style friction shifters in a geezer-friendly location near the brakes. Despite how wacky they look, they're actually extremely nice to use:
As I started to think more about the fit of the bike, my attention turned to the crankset. The existing crank was a low-end three-piece crankset with steel chainrings and 170mm cranks. After reading various articles on crank length, I decided to see if I could come up with a set of 185mm cranks for the bike. But, as with all of these upgrade paths, there were constraints. First, I didn't want to change the front derailleur, so that meant sticking with a double. Second, I didn't want to change the chain or the cluster, so that meant avoiding hyperglide or ulgtraglide chainrings.
Harris had a promising solution: a set of vintage
185mm TA Vis Pro 5 ("cyclotouriste") crankarms.
Unfortunately, they did not have chainrings that would allow me to maintain the current gearing on the bike (which I like,
chart appended below).
---------------------------------------------------------------------------
SP  CRxFW    GI      GIdf      DI      diff      DF        PRPM      RT
---------------------------------------------------------------------------
1>  40x32   33.75   14.29%   106.03   15.15    8'10.03"   597.57   1:1.25
2>  40x28   38.57   13.75%   121.18   16.66   10' 1.18"   522.88   1:1.43
3>  52x32   43.88    2.56%   137.84    3.53   11' 5.84"   459.67   1:1.62
4>  40x24   45.00   11.43%   141.37   16.16   11' 9.37"   448.18   1:1.67
5>  52x28   50.14    7.69%   157.53   12.12   13' 1.53"   402.21   1:1.86
6>  40x20   54.00    8.33%   169.65   14.14   14' 1.65"   373.48   1:2.00
7>  52x24   58.50    8.60%   183.78   15.80   15' 3.78"   344.75   1:2.17
8>  40x17   63.53   10.50%   199.58   20.96   16' 7.58"   317.46   1:2.35
9>  52x20   70.20    9.89%   220.54   21.81   18' 4.54"   287.30   1:2.60
10>  40x14   77.14    7.06%   242.35   17.11   20' 2.35"   261.44   1:2.86
11>  52x17   82.59   21.43%   259.46   55.60   21' 7.46"   244.20   1:3.06
12>  52x14  100.29    0.00%   315.06    0.00   26' 3.06"   201.11   1:3.71
---------------------------------------------------------------------------
SP  CRxFW    GI      GIdf      DI      diff      DF        PRPM      RT
---------------------------------------------------------------------------
But I found a fellow in Toronto (
Bicycle Specialties) who had a stock of TA Cyclotouriste rings, so I had him send me the rings and the mounting hardware.
Next stop was a new bottom bracket. The experts at Harris (Jim, Sheldon, and Dave) put their heads together and decided that a 116 (+5 asymmetry) Phil Wood bracket would work for me. Pricey at $112 plus two mounting rings and two Phil consumer tools.
When I got this home, I obsessed for a long, long time about whether this setup was going to work. There are a lot of considerations when selecting a bottom bracket, especially when you have long feet and you're sticking ginormous 185 cranks on an existing bike:
- Chainline
- Front derailleur operating limits
- Clearance between pedal and ground, which is related to
- Q-factor (tread)
- Interference between rider's heel and rear derailleur
- Clearance between crankarms and rear wheel stays
- Interference between rider's toe and front wheel when turned
And the problem is that there's no way to tell if it's going to work without actually installing it on the bike. Which means your pristine $112 Phil Wood bottom bracket ain't going to be so pristine when you take it back to exchange it. Plus, of course, you cannot assemble and disassemble the crankset without an appropriate crank puller, which in the case of a TA crank takes a 23mm (as opposed to the normal 22mm) thread. This is not a case of blame the contrary French, however, as the TA crank predates the other cranks that used 22mm.
Now there are two suppliers of 23mm crank pullers, Park tool used to make a reversible 22/23mm puller with handle and
VAR still does, although their distribution in the US is spotty. Turns out that Harris didn't have one of these, but
VELO Orange did.
In order to minimize potential pedal-to-ground interference problems (all of the technical advisors to whom I spoke had the same response: "Don't pedal through the turns, buddy"), I bought a set of MKS platform pedals, which are narrow and slightly shallower than the non-name touring pedals that had been on the bike. Plus, they take 'standard' MKS toeclips.
So last night I put this whole thing together, and the end result is pretty amazing: The chainline is quite close in, the crank arms clear the rear stays by just 3 or 4 mm, and my feet clear the derailleur. Because of the closer Q-factor and the smaller pedals, I have at least as much pedal clearance through turns as I did before. The only real interference is toes-to-pedals, which is a non-issue above parking lot speeds.
Parenthetically, I would note that this upgrade has been extremely satisfying on a personal level. From the moment I first acquired the bike about 25 years ago, I was not satisfied with the crankset. I disliked the cast-in-place nonremovable chain guard, the heavy steel chain rings, and the fact that the damn thing was warped.
 Sweet new TA crankset
 Nasty old "custom" crankset
I never had the time or money when I was a kid to go through the rigmarole of putting on a proper crankset (and before the whole internet thing, living up in the woods of New Hampshire, it would have been impossible to find the components anyway.)
Anyway, the only thing left to do now is take it out for a ride!
Which I did. It works well, and is very comfortable. Biggest problem is that the front shifting requires more finesse than the old chainrings. In particular, if you don't downshift firmly and with an appropriate amount of pedaling force, the chain gets hung up on the inner ring, and then wedges itself into the chainstay.